Motorcycle electrics explained: Switchgear
By Rupert Paul
Motorcycle Journalist
03.10.2017
Rupert Paul of Rupe’s Rewires has been designing and building custom wiring looms for six years. Here’s his take on what to look for when you buy aftermarket electrics…
A good custom bike needs switchgear that matches the overall vibe, dude. However, it also needs to work. The gold standard for me is a Yamaha XJ900 switch that is still fine after 30 years and 68,000 miles, despite sitting in a garden so long a tree grew through the frame. So, what’s out there to match that?
Smallest of all are the ‘biscuit tin’ switches originally fitted to 1960s/’70s British and Italian bikes. Replicas are widely available for under a tenner, but their electrical make/break can be iffy, and the spring mechanism can often short out on the biscuit tin cover. I strip and rebuild these with decent 16A thin-wall cable as a matter of course. Replica ‘bakelite’ Brit headlamp switches are equally suspect, but usually work well eventually.
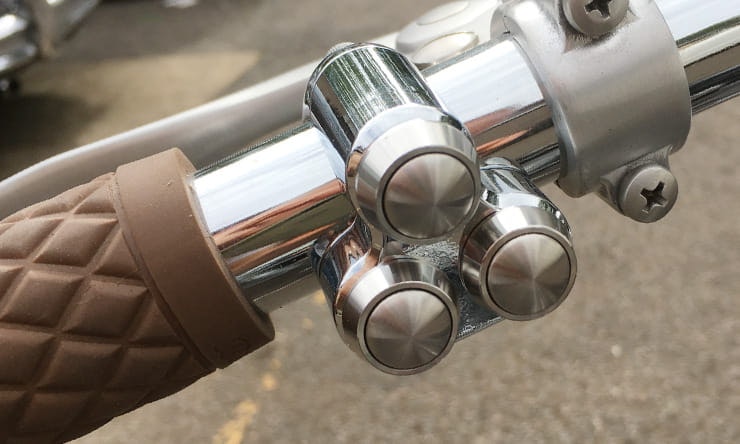
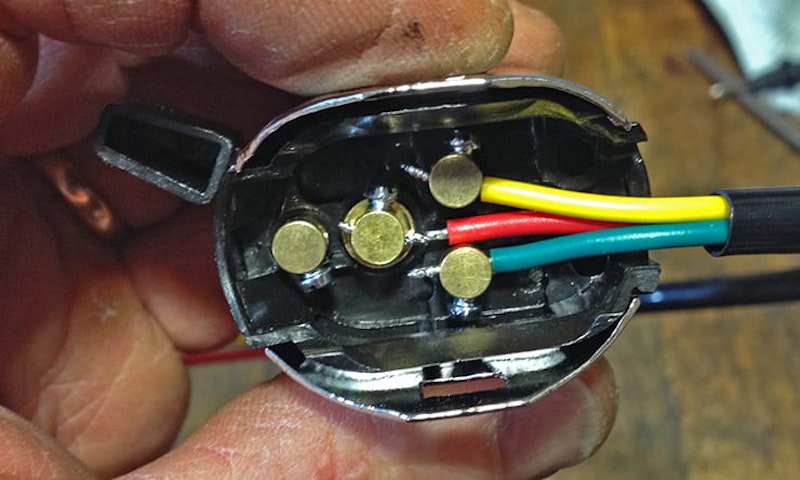
Next are the push-button types by Motogadget, Motone and ISR, which also allow through-the-bars wiring. I’ve not used ISR, but the other two consist of push-to-connect buttons where you attach the cables with screws like those on domestic plugs – only much, much smaller and easier to lose. They are low current switches designed to work relays or an M-Unit, so you can use very thin cable. That helps, because space is tight, but the screws will often chew up the bare cable strands, so you need little ferrules to protect them. Bear in mind though that…
Each button has two screw connectors
The buttons themselves screw into the switch cluster
Said buttons finish up with the screw connectors at any old angle
On the Motone you can only tighten the screw terminals for half the button’s rotation
If you’re a bit careless the finished connector will short out on the handlebar when you tighten it up.
If you ask me, that adds up to a pain in the bum. A British company called Motorcycle Switchgear sells an interesting push-button variation, with connections already made. That’s much more my cup of tea.
There’s not much conventional OE switchgear that suits a custom build, even if it is usually superb quality. As for aftermarket stuff, it’s up to you to ensure that it works in the way it needs to on your bike. The unbranded switch in the pic has a nice period look but uses minimal copper strands that may or may not be enough for a 60 watt headlight. You could replace the relevant cables, or use a relay to carry the main lighting current.
Allens Performance, famous for carbs, sells this very high quality pair of hinged switches. However, the dip/main switch is a push button that’ll only work through a thing called a latch relay, which has to be wired exactly right.
The other option is to use standard switchgear from an old bike. For example, Yamaha specialists Yambits does replicas for most 1970s/’80s models.
They’re very nice, but they take a bit of working out, and the castings sometimes need a bit of flashing grinding off before the two halves will clamp tightly. This is the big thing with switchgear: making it clamp tightly.
Get more advice on all forms of motorcycle electrics by clicking here
Rupe’s Rewires
Meet Rupert Paul, BikeSocial’s electrics expert…
Share on social media:

