BikeSocial workshop: How to fit a motorcycle alarm / immobiliser
By John Milbank
Consumer Editor of Bennetts BikeSocial
04.12.2017
Valuable theft deterrent or screaming annoyance? Whatever you think of motorcycle (or car) alarms, there’s little argument that they can provide a valuable extra layer of security.
While we’ve all seen the videos of crooks stealing a bike with the alarm screaming, then ripping the panels off to get at it, nobody ever shares the footage of some low-life ignoring a bike because of the warning light, or running off when it starts wailing, so we never see the good they can do.
For two years I’ve had a Datatool Evo alarm fitted to my KTM, and it’s not once given me a problem. If you think alarms are more hassle than they’re worth, read our other article by clicking here.
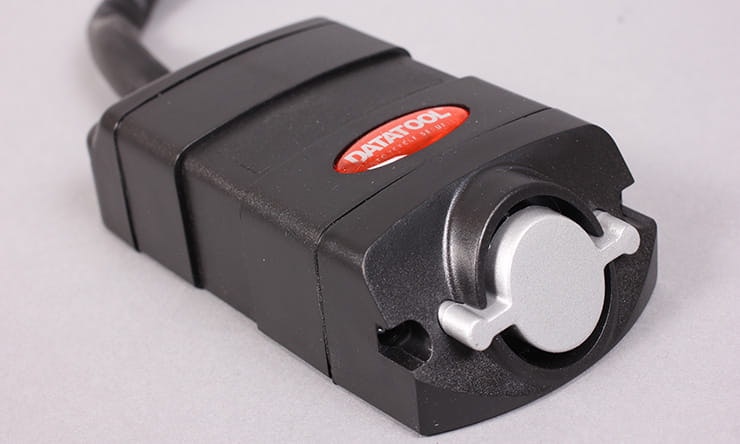
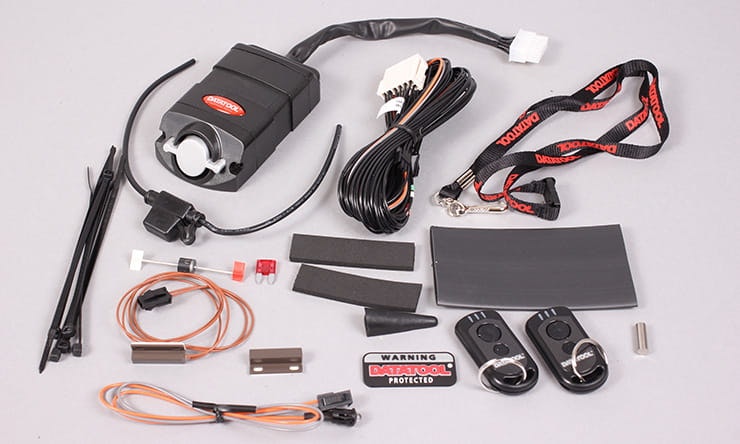
In this feature, we’re going to be fitting a Datatool Evo Plus, which is a combined alarm and immobiliser that can be fitted by your dealer, a professional fitter like The Bike Alarm Man or, if you’re handy with the tools, yourself. I’m using this system on my Honda MSX125 as it doesn’t have any form of immobiliser as standard, so it’d be all too easy for a thief to force the ignition barrel or hotwire it.
It’s important to note that this is not a Thatcham-approved immobiliser – these must always be installed by a professional, and you’ll receive a certificate that your insurer might want to see in the event of a claim.
1 Find a good location
The first thing to consider is where you’re going to put the alarm. I prefer to strip a bike as far as I can to find the best spot possible, but on this little Honda space is extremely tight, so I tucked it away in the rear side panel.
Ideally you want it as hard to get to as possible, though if a thief is determined to get to it in order to rip it out, the more panels there are, the more damage they might cause. It’s a tricky decision to make, but don’t put it somewhere too easily accessible.
If you do have any secondary security, like a tracker for instance, keep the alarm well away from it – you don’t want a thief to find that while disabling the alarm as it could be your chance to have them caught and the bike returned.
I decided to make slightly flexible plastic bracket that would allow the alarm to be pushed down as the tail unit is refitted – it then springs back up and tucks tightly into the corner. On most bikes you’d likely find somewhere much more simple.
2 Plan the wiring
The plain black cables have coloured markings for the installation – once you’ve cut off the cable you don’t need, these will all be unrecognisable. For this system you’ll need an earth, fused live (a fuse is supplied), switched live and a wire that’s essential to the running of the machine. It mustn’t be anything that requires a large current draw – I used the kill-switch, which can interrupted as it enters the loom.
You’ll also pick up the indicators, have a pair of cables for the supplied warning LED, and a pair for a seat switch. There’s also an accessory cable and connection for an optional external siren, but I didn’t use these.
This job will be a lot easier if you can find a wiring diagram for your bike – I got one off the internet, but if you do that, be very careful that you have the correct one. Mine was for the latest model, which has an LED headlight, but being for the US, it didn’t have the ABS circuit – it’s another plug and set of wires that could confuse if you’re not careful.
A multimeter can be a big help if you need to check connections, but if you’re not sure how to use one, don’t go stabbing it around randomly – if you’re not confident, please let a pro fit your system.
Once I’d decided that I wouldn’t need some of the wires, I cut them off and insulated them (leaving a little spare, just in case!).
3 Hide the wiring
Once I’d decided exactly where each wire would go and how long it needed to be, I created a loom wrapped with black insulation tape, the relevant wires leaving the main bundle where necessary. By measuring them all before taping up, it created something that not only protected the wires, but is also much easier to hide. I tucked it under the bike’s loom, and where possible taped it to it.
Do not use and of these connectors on your bike!
4 Prepare the bike’s wires
Most of the cables on the bike – like the power, switched live and indicators – simply need the insulation stripping back so you can tap into them. Do not be tempted to use cable lock connectors or any form of crimps – these will corrode, and will cause problems down the line.
Some wires need to be tapped into, while others need cutting
You can use a sharp blade to carefully open the insulation, but I use a pair of automatic strippers. I then strip back the trimmed end of the alarm wire, wrap the exposed cable around the bike’s cable, then solder it in place for a very secure and reliable join.
Once cooled, I paint some liquid tape on, before wrapping it in ‘real’ insulation tape. You could skip the liquid, but I’m a belt and braces kind of guy.
Liquid tape – great for sealing wires back up
If you’re picking up from more than one wire in the same area, try to stagger the joints, so if the insulation were to be damaged, the bare wires couldn’t touch one another.
For the immobilisation wire that needs cutting, you can use heat-shrink tubing to insulate the joints, which is my preferred method. Again, insulation tape is okay, but make sure it’s well sealed, so no moisture can creep in and slowly corrode your wires.
5 Connect it and test it
Pick up from the bike’s loom for a reliable earth – it’s much better than bolting to the frame, and of course, never connect the earth or live direct to the battery, as it’s too easy for the thief to spot.
Once everything else was connected, I wired in the live supply, hiding the cable and fuse well under the main loom. The warning lamp can be put anywhere, but I usually pop it in the number plate carrier. People often fit them inside the tail light, but if your bike has an LED unit, be very careful as most of the back is circuit board.
6 Fine tune it
Using the remote control fob, the warning LED and a series of beeps from the siren, you can set up a few options on the alarm, including the vibration sensitivity – don’t be tempted to set it at maximum too quickly, as it could keep going off. Take your time and find what works best.
If you’re worried about your battery going flat, you can put the unit into a storage mode, which completely deactivates it, but leaves your machine immobilised until the ignition’s next turned on and the remote fob is pressed. But you’d have to leave it for a long time – I tested the system, and found that it draws just 3.28mA when it’s in standby mode, and 2.8mA when it’s armed. A 9Ah pack would take would take about 134 days to discharge when this alarm’s turned on!
Rough guide to soldering
Simple steps to soldering an alarm. Apologies for the poor focus – I’ll make a new video when I next install an alarm.
Share on social media:

